Dashboard
The SelfCare dashboard page is the default landing page which is visible once the subscriber logs into their respective account. The dashboard gives an overview of the subscriber’s account with respect to their current account balance, current due, account number, last payment amount & date, list of subscriptions, orders and invoices.
The subscriber can navigate to the list of subscriptions, orders and invoices by accessing view more link under each of the respective heads.
Preview of the Self-care Dashboard page:
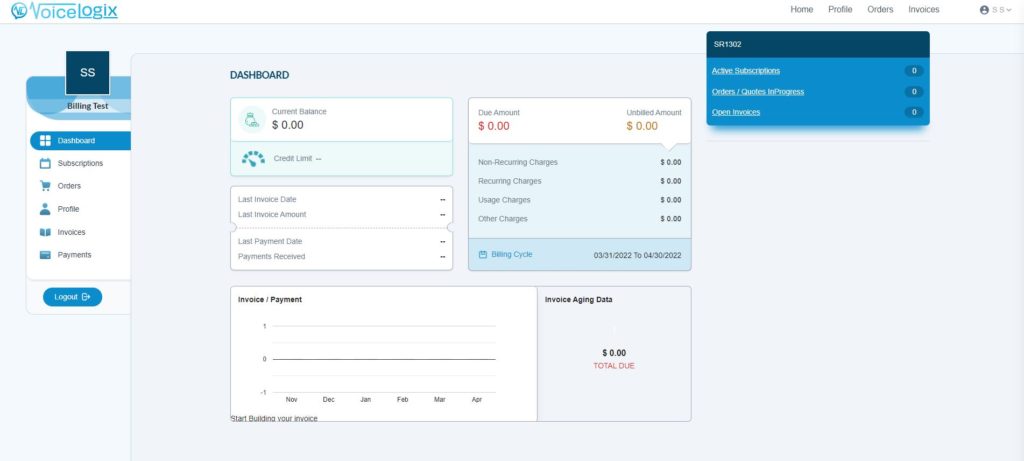
Field Descriptions:
The following fields are present in the OneBill Selfcare Dashboard screen. Each of the fields has been described in detail below:
- Current Account Balance: This field displays the current account balance associated with the subscriber. It is the sum of the current due amount and the upcoming unbilled transactions.
- Current Due: This is the due amount that the subscriber is required to pay for which an invoice has been generated and sent. It shows the exact outstanding due amount that you need to pay.
- Subscriber Since: It is the date on which the subscriber account was created in the OneBill system.
- Credit Limit: The maximum credit limits up to which a subscriber is allowed to have dues.
- Last Payment Date: This field shows the date on which the subscriber made the last payment.
- Last Payment Amount: This fields displays the last amount that was paid by the subscriber.
- My Subscriptions: The My Subscriptions column shows the subscriptions which are associated with the subscriber account.
- My orders: This column shows the orders placed by the subscriber.
- My Invoices: This column displays the invoices which have been generated by the subscriber.
Subscriptions
The Subscriptions page shows the list of subscriptions associated with the corresponding account.
The default listing on the page shows active subscriptions linked to the subscriber.
The subscriber can click of the Product/Price Plan name link to view the details about the subscription.
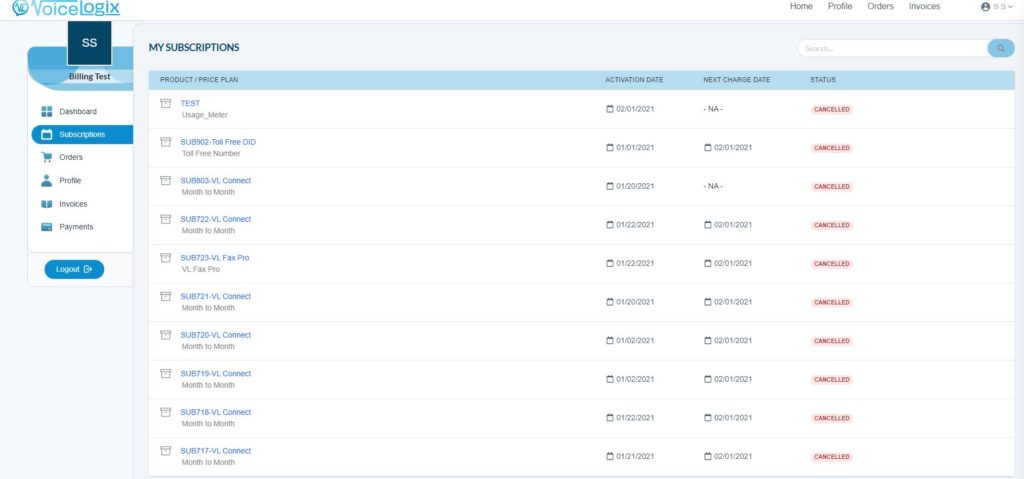
The listing displays the following fields:
- Product/Price Plan: Subscription price plan that the subscriber has opted for.
- Activation Date: Subscription plan activation date.
- Next Charge Date: Denotes the next charging date based on the billing cycle configured.
- Status: Current subscription status. For example: Active, Inactive.
While you mouse over the subscription identifier and click on it, it displays the price plan name-product name, recurring frequency, quantity, status and a list of features linked to the subscription.
The Subscription detail page also provides additional details such as Quantity, Status, Charge, Frequency, Last Charged Date, Next Charge Date, Service End Date.
My Orders
My Orders page shows the list of orders placed by the subscriber at various intervals.
On click of the Order Number link, the list expands giving details about the Order
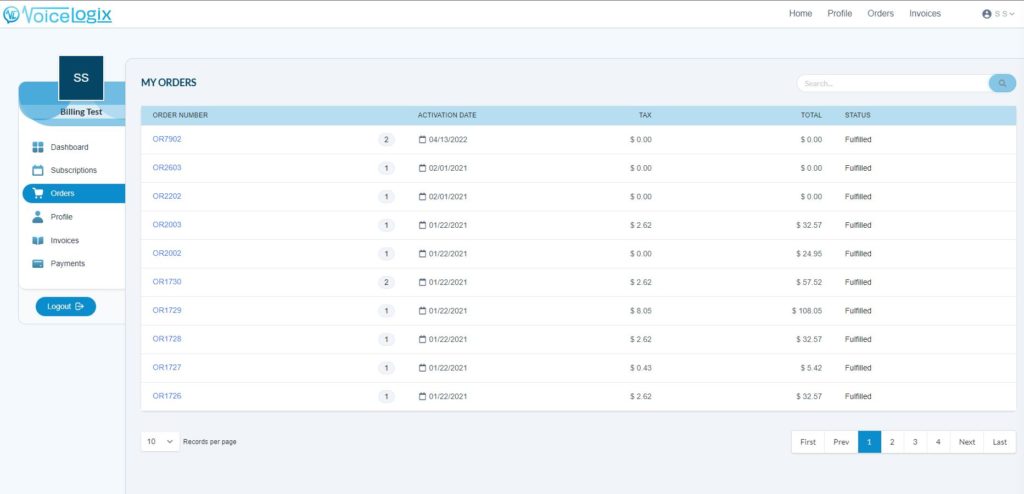
The order listing displays the following fields:
- Order Number: Order number assigned to an order, created by the subscriber
- Activation Date: Date on which the order is activated.
- Order Items: Number of items within an order.
- Amount: Total charges applied for the order.
- Status: The order state which displays the stage of processing a particular order is in. For example, Draft, Pending Activation, Active, Order Fulfilled (Billing Active) and Pending Contract Approval.
The Order detail page also provides additional details such as Order ID, Order Name (reference as provided by the subscriber), Order Date, Billing Active Date, Order Created By, Order Subtotal, Order Tax value, Total Order Amount and Products/Price Plans selected within an order along with the Quantity and Frequency details.
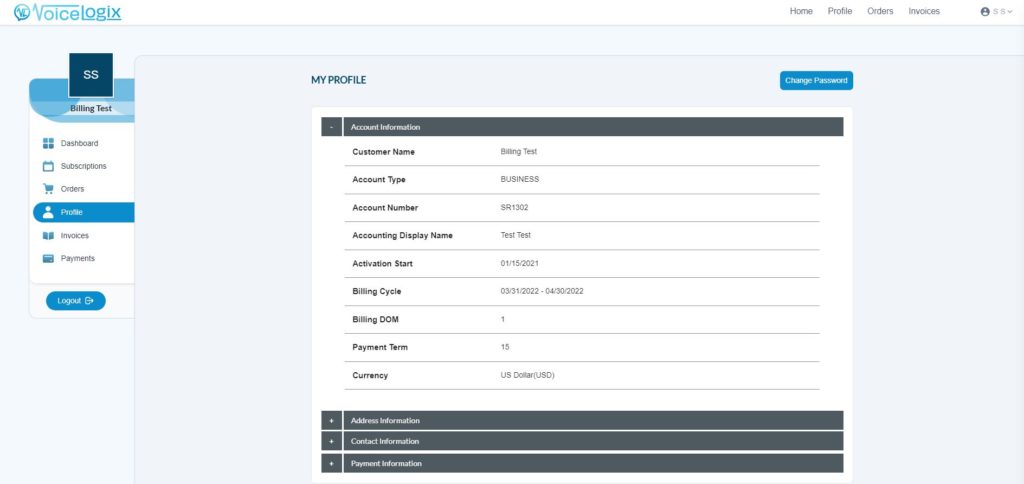
My Profile
My Profile page helps the subscriber to manage their profile information that includes account, address contact and payment information from a single page.
This data comes from the subscriber registration flow at the time of creating a new account for a subscriber.
So, when the account for the new subscriber is being created by the provider, all of this information is saved and stored accordingly. Subscriber profile information is a prerequisite to access any information within the selfcare portal. My Profile page has several sections that can be managed by the subscriber.
Change Password: Click on the “Change Password” button to change the password. The portal will prompt the user to add their current password, new password and will also ask to verify the new password as well.
Account Information: Manage profile related information related to customer name, account type (business / individual), currency and account logo.
The listing displays the following fields:
- Customer Name: This field shows the name of the customer.
- Account Type: This field shows if the account is an INDIVIDUAL or a BUSINESS account.
- Currency: Shows the choice of currency as set by the provider.
- Account Logo: The user an upload a logo using this option by clicking on the Browse button.
Here is the detailed overview on each of those tabs within the profile page:
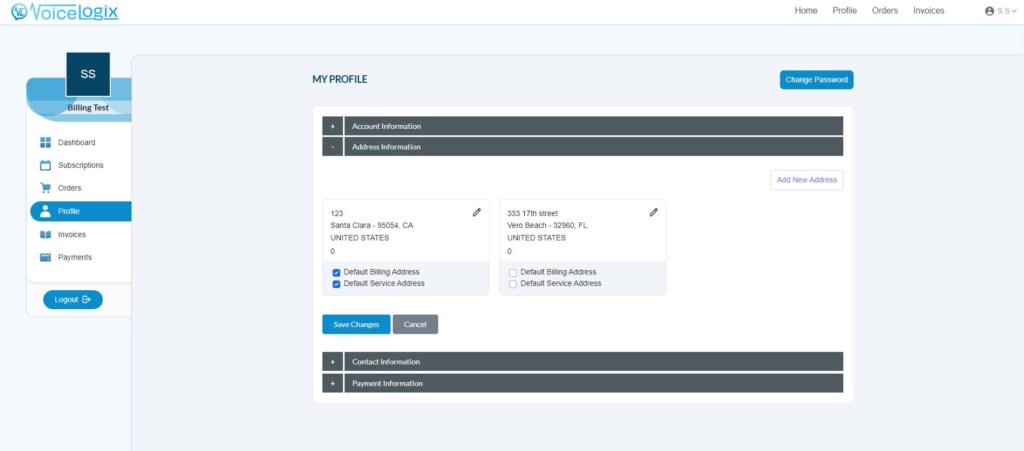
Address Information: This section has details on all addresses linked to the subscriber. The address could be the billing address or the address where the service is being provided. Custom address attributes will be visible in this section of the page as well.
You can edit the address by clicking on the pen (edit) icon and make updates to it.
Click on Save Changes to save and apply the updates.
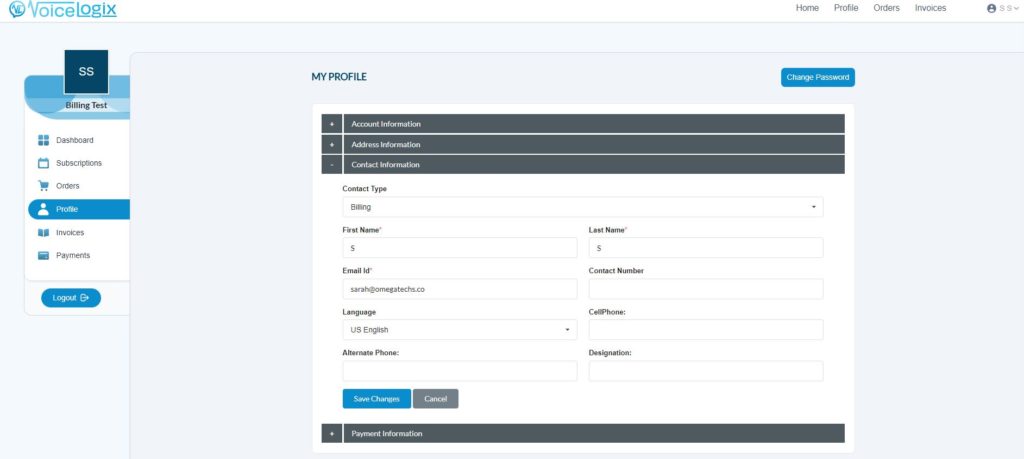
Contact Information: This section shows the details of the contact linked to the subscriber.
Additional Information: This section includes all the custom fields that are added by the business. The subscriber can view or update information in this section.
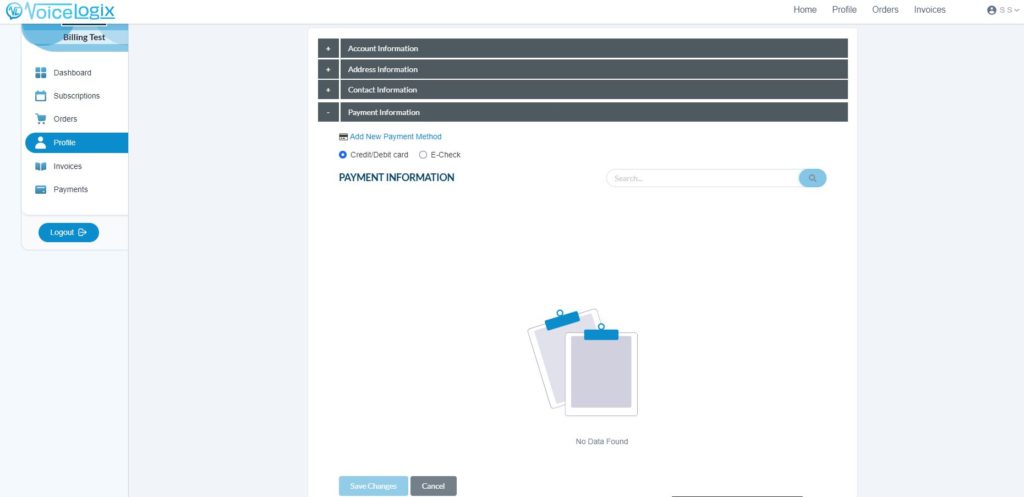
Payment Information: Payment section is used to capture the subscriber payment detail. The detail could be a credit card or a bank account detail (bank account supported only with Authorize.net). The actions available for a payment profile are as follows.
- View/Edit: Click on this option to view or edit the payment profile details.
- Extend Validity: Click on this option to extend the validity of the payment profile.
- Delete: Click on this option to delete an expired payment profile.
Add New Payment Method: Click on to add a new payment profile.
Invoices
Invoices page displays all the invoices created against the subscriber.
The subscriber would be able to click on the invoice to view the pdf of the invoice, and if the invoice is not paid, the subscriber can pay for the invoice from here.
Invoice Listing in Selfcare:
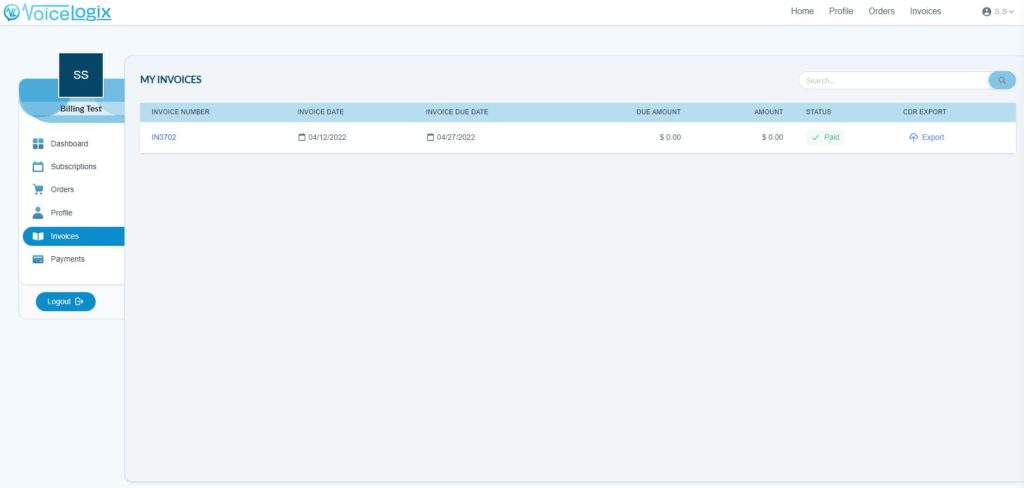
If the invoice is not paid, the subscriber gets to pay his invoice from this section. Clicking on the Pay button prompts the user to select the card and make the payment.
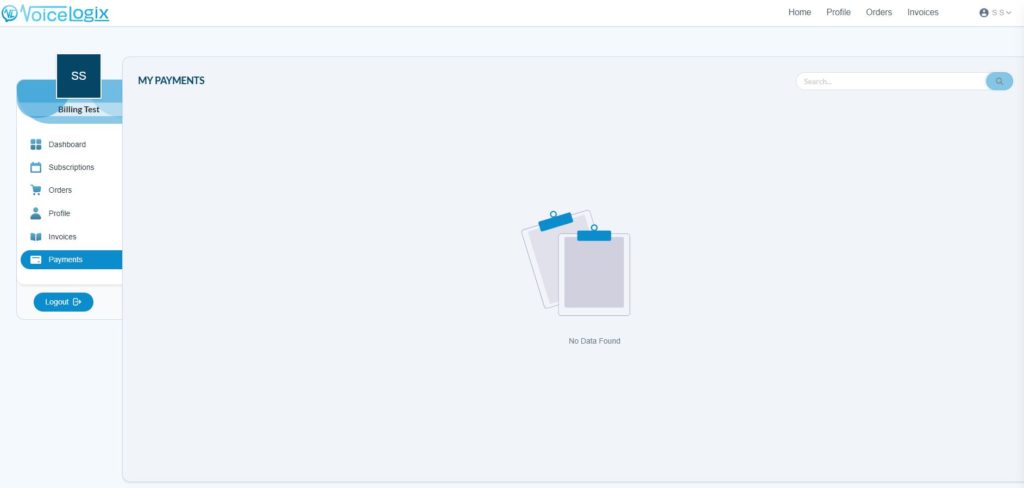
Payments
Payment’s page displays all the payments recorded against the subscriber as well as any refund processed. This could include any automated payments processed from OneBill, as well as manual payment recorded either from Selfcare/through a CSR user. The subscriber would be able to view his payments as well as download payment receipts from this section.
The payment table has the following information:
- Payment date: The date when the payment was recorded on the system.
- Receipt Number: This field would contain a receipt number generated internally by OneBill
- Payment Type: This field would contain the payment type used. This would have values of cash, check etc depending on how the payment was registered. Since this listing shows both payment and refund, the type of transaction is shown along with the payment type.
- Payment Amount: This field would display the amount of the payment.
- Download Receipt: This field would be a link, which the user can click to download a payment receipt.